-
Day 02. 매수 전략Project/BTC_AutoTrade 2022. 8. 25. 22:26728x90반응형
앞 전 포스팅에서 환경설정이 완료 되었다면 이제 실질적인 매수 전략에 대해 알아보자. 아래 포스팅 참고!!
기본적인 매수전략으로 백테스팅 전략을 공부하였다.
관련 코드는 아래 링크 참고하자.
파이썬을 이용한 비트코인 자동매매 (개정판) - WikiDocs
파이썬을 이용한 비트코인 자동매매 (개정판)
이 책은 최근 인기 있는 프로그래밍 언어인 파이썬을 사용하여 국내 3대 거래소(코빗, 빗썸, 업비트) 및 국외 거래소(바이넨스)에서 비트코인을 자동매매하는 프로그램을 개발하 ...
wikidocs.net
파이썬을 이용한 비트코인 자동매매 (개정판) - GitHub
GitHub - sharebook-kr/book-cryptocurrency
Contribute to sharebook-kr/book-cryptocurrency development by creating an account on GitHub.
github.com
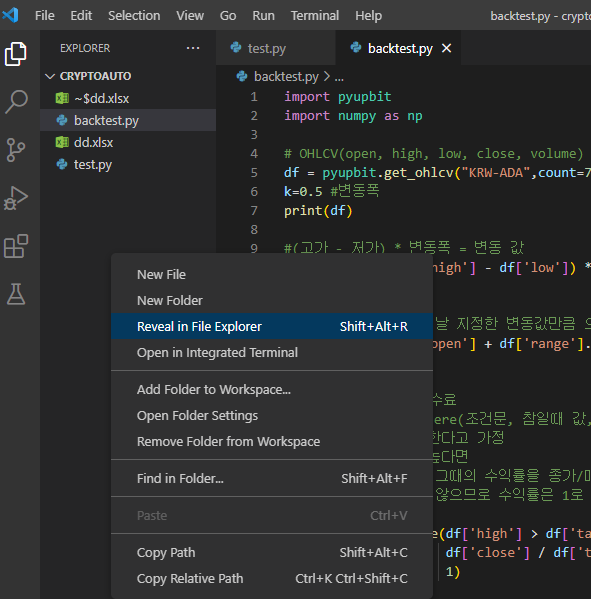
ch07/07_13.py 를 참고하면 다음과 같다.
This file contains bidirectional Unicode text that may be interpreted or compiled differently than what appears below. To review, open the file in an editor that reveals hidden Unicode characters. Learn more about bidirectional Unicode charactersimport pybithumb import numpy as np df = pybithumb.get_ohlcv("BTC") df['range'] = (df['high'] - df['low']) * 0.5 df['target'] = df['open'] + df['range'].shift(1) fee = 0.0032 df['ror'] = np.where(df['high'] > df['target'], df['close'] / df['target'] - fee, 1) df['hpr'] = df['ror'].cumprod() df['dd'] = (df['hpr'].cummax() - df['hpr']) / df['hpr'].cummax() * 100 print("MDD(%): ", df['dd'].max()) df.to_excel("dd.xlsx") 해당 코드를 vscode 에 복사하여 아래 이미지 화살표버튼을 클릭하면 실행이 되는데
df라는 표를 만들고 해당 df를 dd.xlsx 엑셀파일로 만드는 것을 확인할 수 있다.
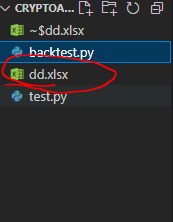
해당 excel 파일을 vscode에서 열어볼려면
Shift + Alt + R 또는
다음과 같이 마우스 우클릭 후 Reveal in File Explorer 버튼을 눌러 폴더 위치를 확인하고 엑셀 파일을 확인해 볼 수 있다.
반응형이제 백테스팅 전략 코드를 해석해보자.
This file contains bidirectional Unicode text that may be interpreted or compiled differently than what appears below. To review, open the file in an editor that reveals hidden Unicode characters. Learn more about bidirectional Unicode charactersimport pyupbit import numpy as np # OHLCV(open, high, low, close, volume) 당일 시가, 고가, 저가, 종가 거래량에 대한 데이터 df = pyupbit.get_ohlcv("KRW-ADA",count=7) k=0.5 #변동폭 print(df) #(고가 - 저가) * 변동폭 = 변동 값 df['range'] = (df['high'] - df['low']) * k print(df) # 당일 시가에서 이전 날 지정한 변동값만큼 오르면 매수가로 지정하겠다 라는 뜻 df['target'] = df['open'] + df['range'].shift(1) print(df) # #fee = 0.0032 #수수료 # ror(수익율), np.where(조건문, 참일때 값, 거짓일때 값) # 종가에 매도를 진행한다고 가정 # 고가가 타겟값보다 높다면 # 종가에 매도를 진행 그때의 수익률을 종가/매수가로 계산 # 아니면 매도를 하지 않으므로 수익률은 1로 유지 df['ror'] = np.where(df['high'] > df['target'], df['close'] / df['target'], 1) print(df) # 누적 곱 계산 (누적 수익률) df['hpr'] = df['ror'].cumprod() print(df) print() #draw Down 낙폭 df['dd'] = (df['hpr'].cummax() - df['hpr']) / df['hpr'].cummax() * 100 print(df) # max draw down print("MDD(%): ", df['dd'].max()) # # df.to_excel("dd.xlsx") target 이 목표 매수가라고 할 수 있고, 해당 target 으로 매수를 진행했을때의 수익율을 df['ror'] 로 나타낼 수 있고
그 외 누적곱 계산 (수익율을 순서대로 곱해나가면 누적 수익율이라고 할 수 있음), Draw Down 값 (낙폭) , Max Draw Down 값 등을 차례대로 구할 수 있다.
728x90반응형'Project > BTC_AutoTrade' 카테고리의 다른 글
Day 01. 환경 설정 (2) 2022.08.23